

TAUC
This guide includes instructions for generating API keys to connect TP-Link TAUC to Layer 9.
Prerequisites
Section titled “Prerequisites”- Access to TP-Link TAUC with administrator privileges
- API License enabled for TAUC (enable under “Licenses” and free tier is fine)
- Ability to create API keys in the TAUC dashboard
Step 1: Navigate to API Gateway
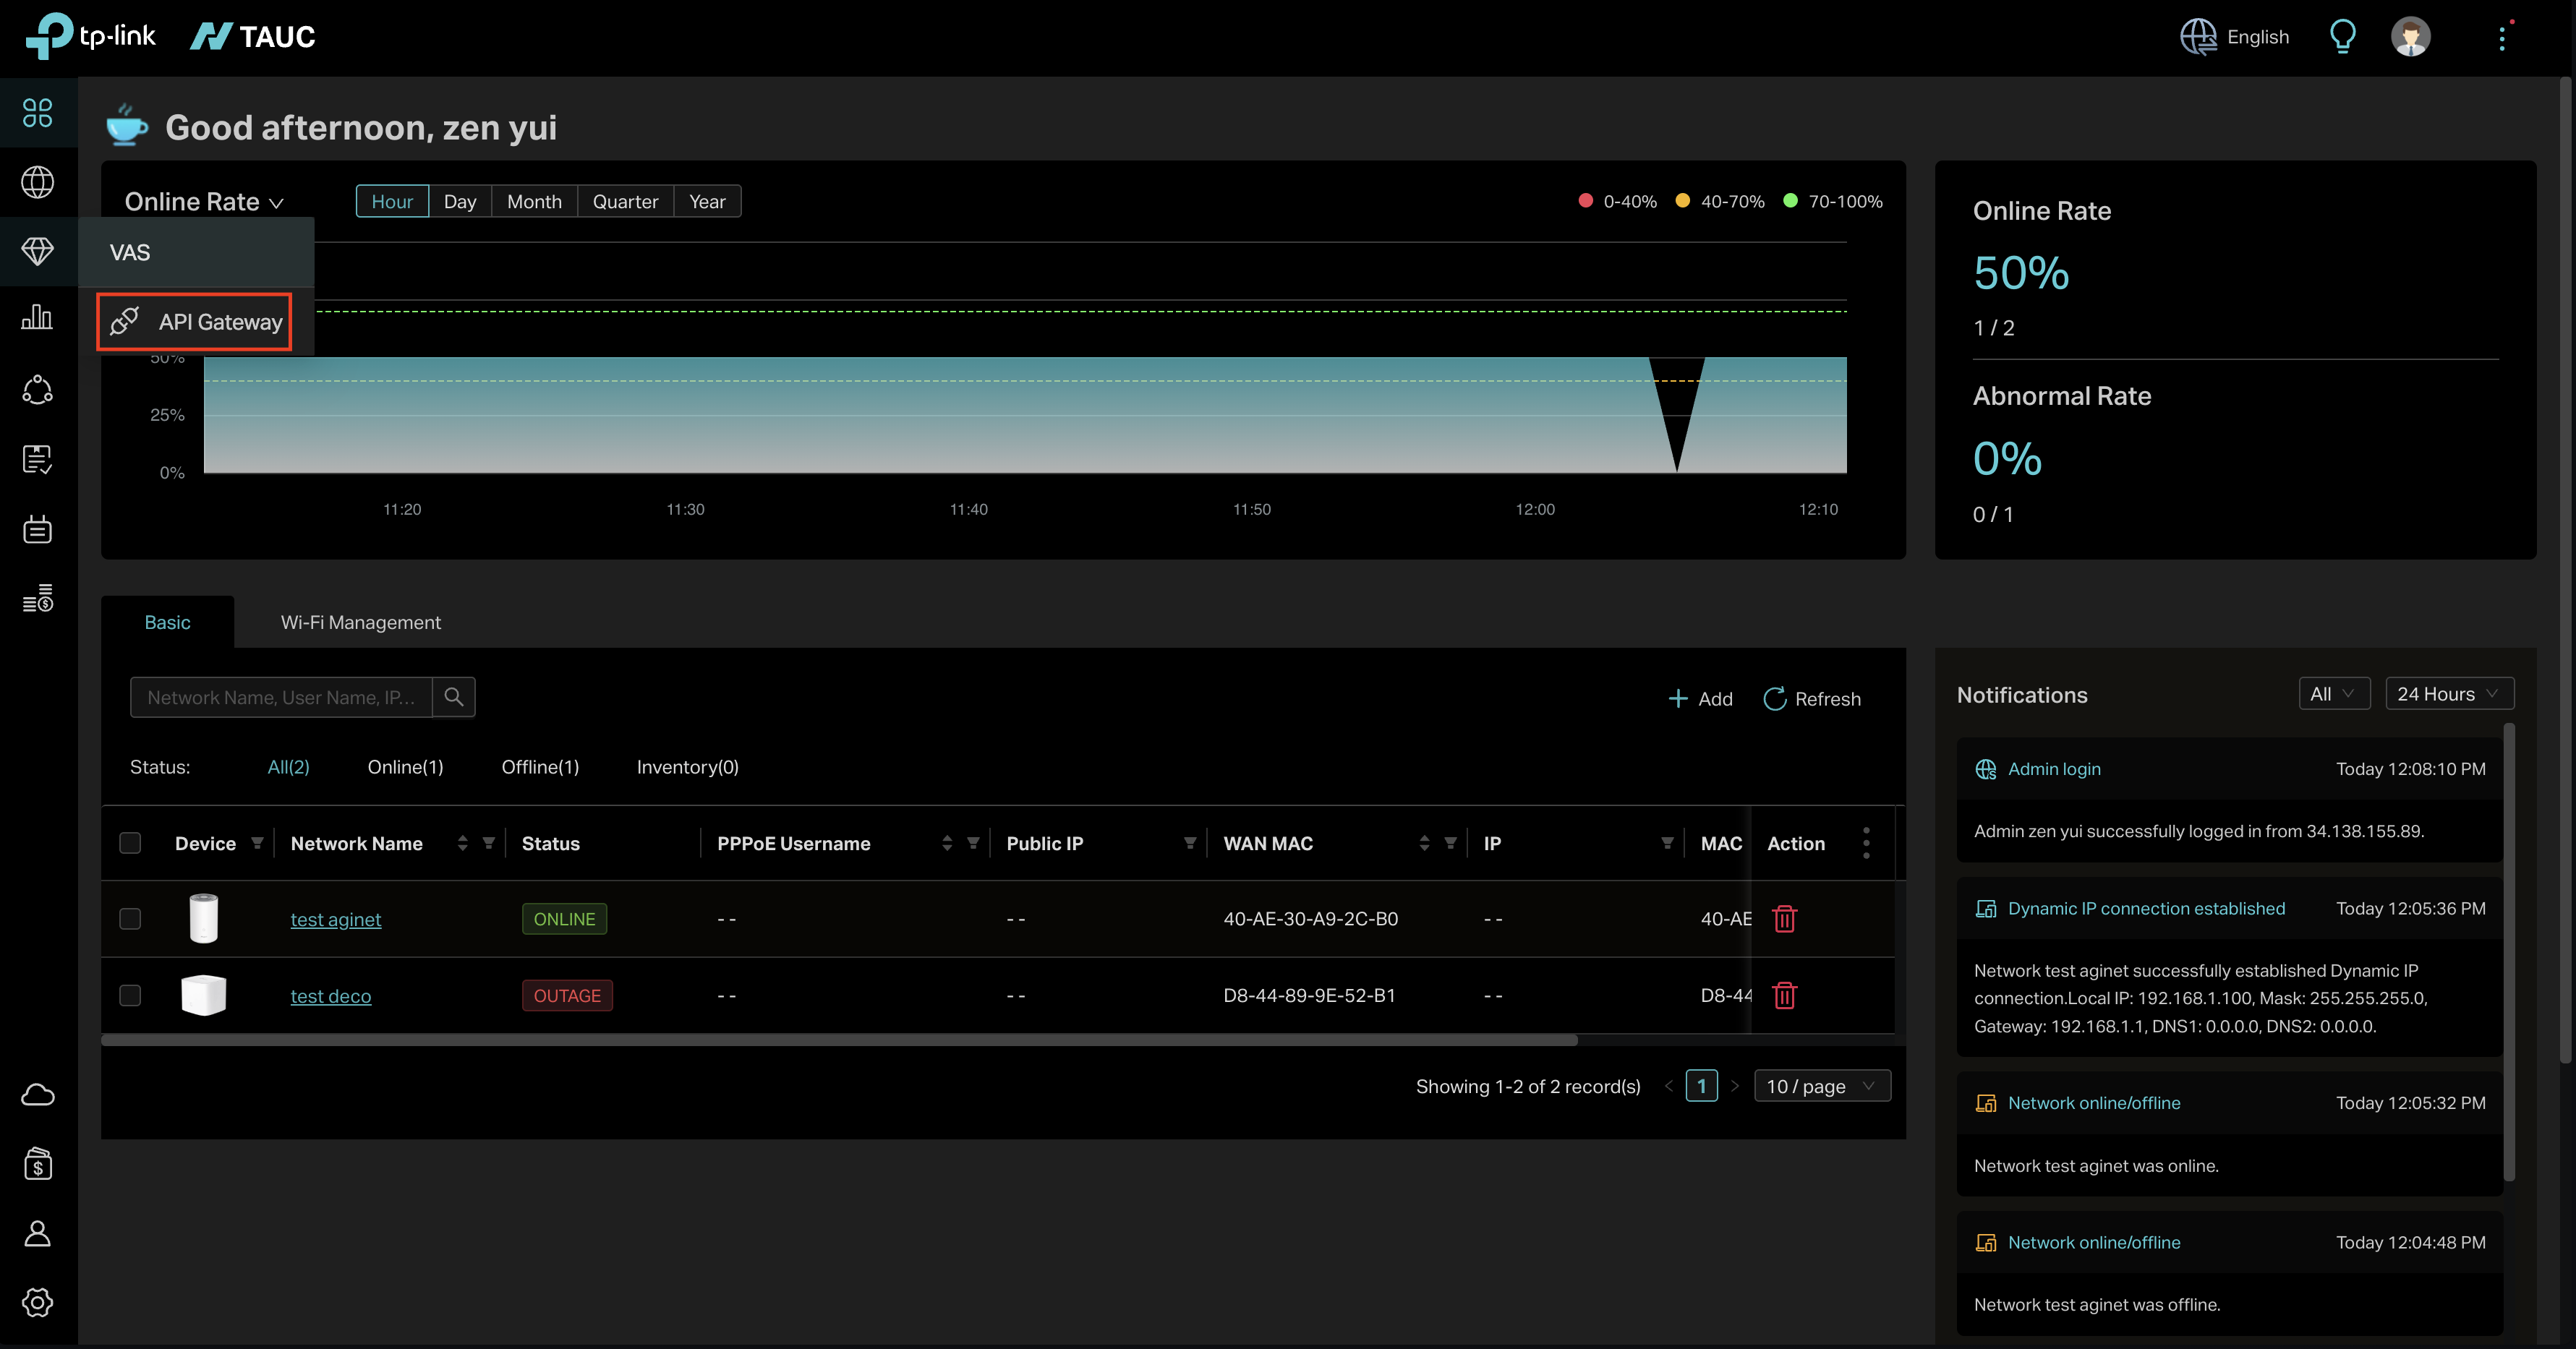
Section titled “Step 1: Navigate to API Gateway”Navigate to the API Gateway section from the main menu.
Step 2: Create New API Key
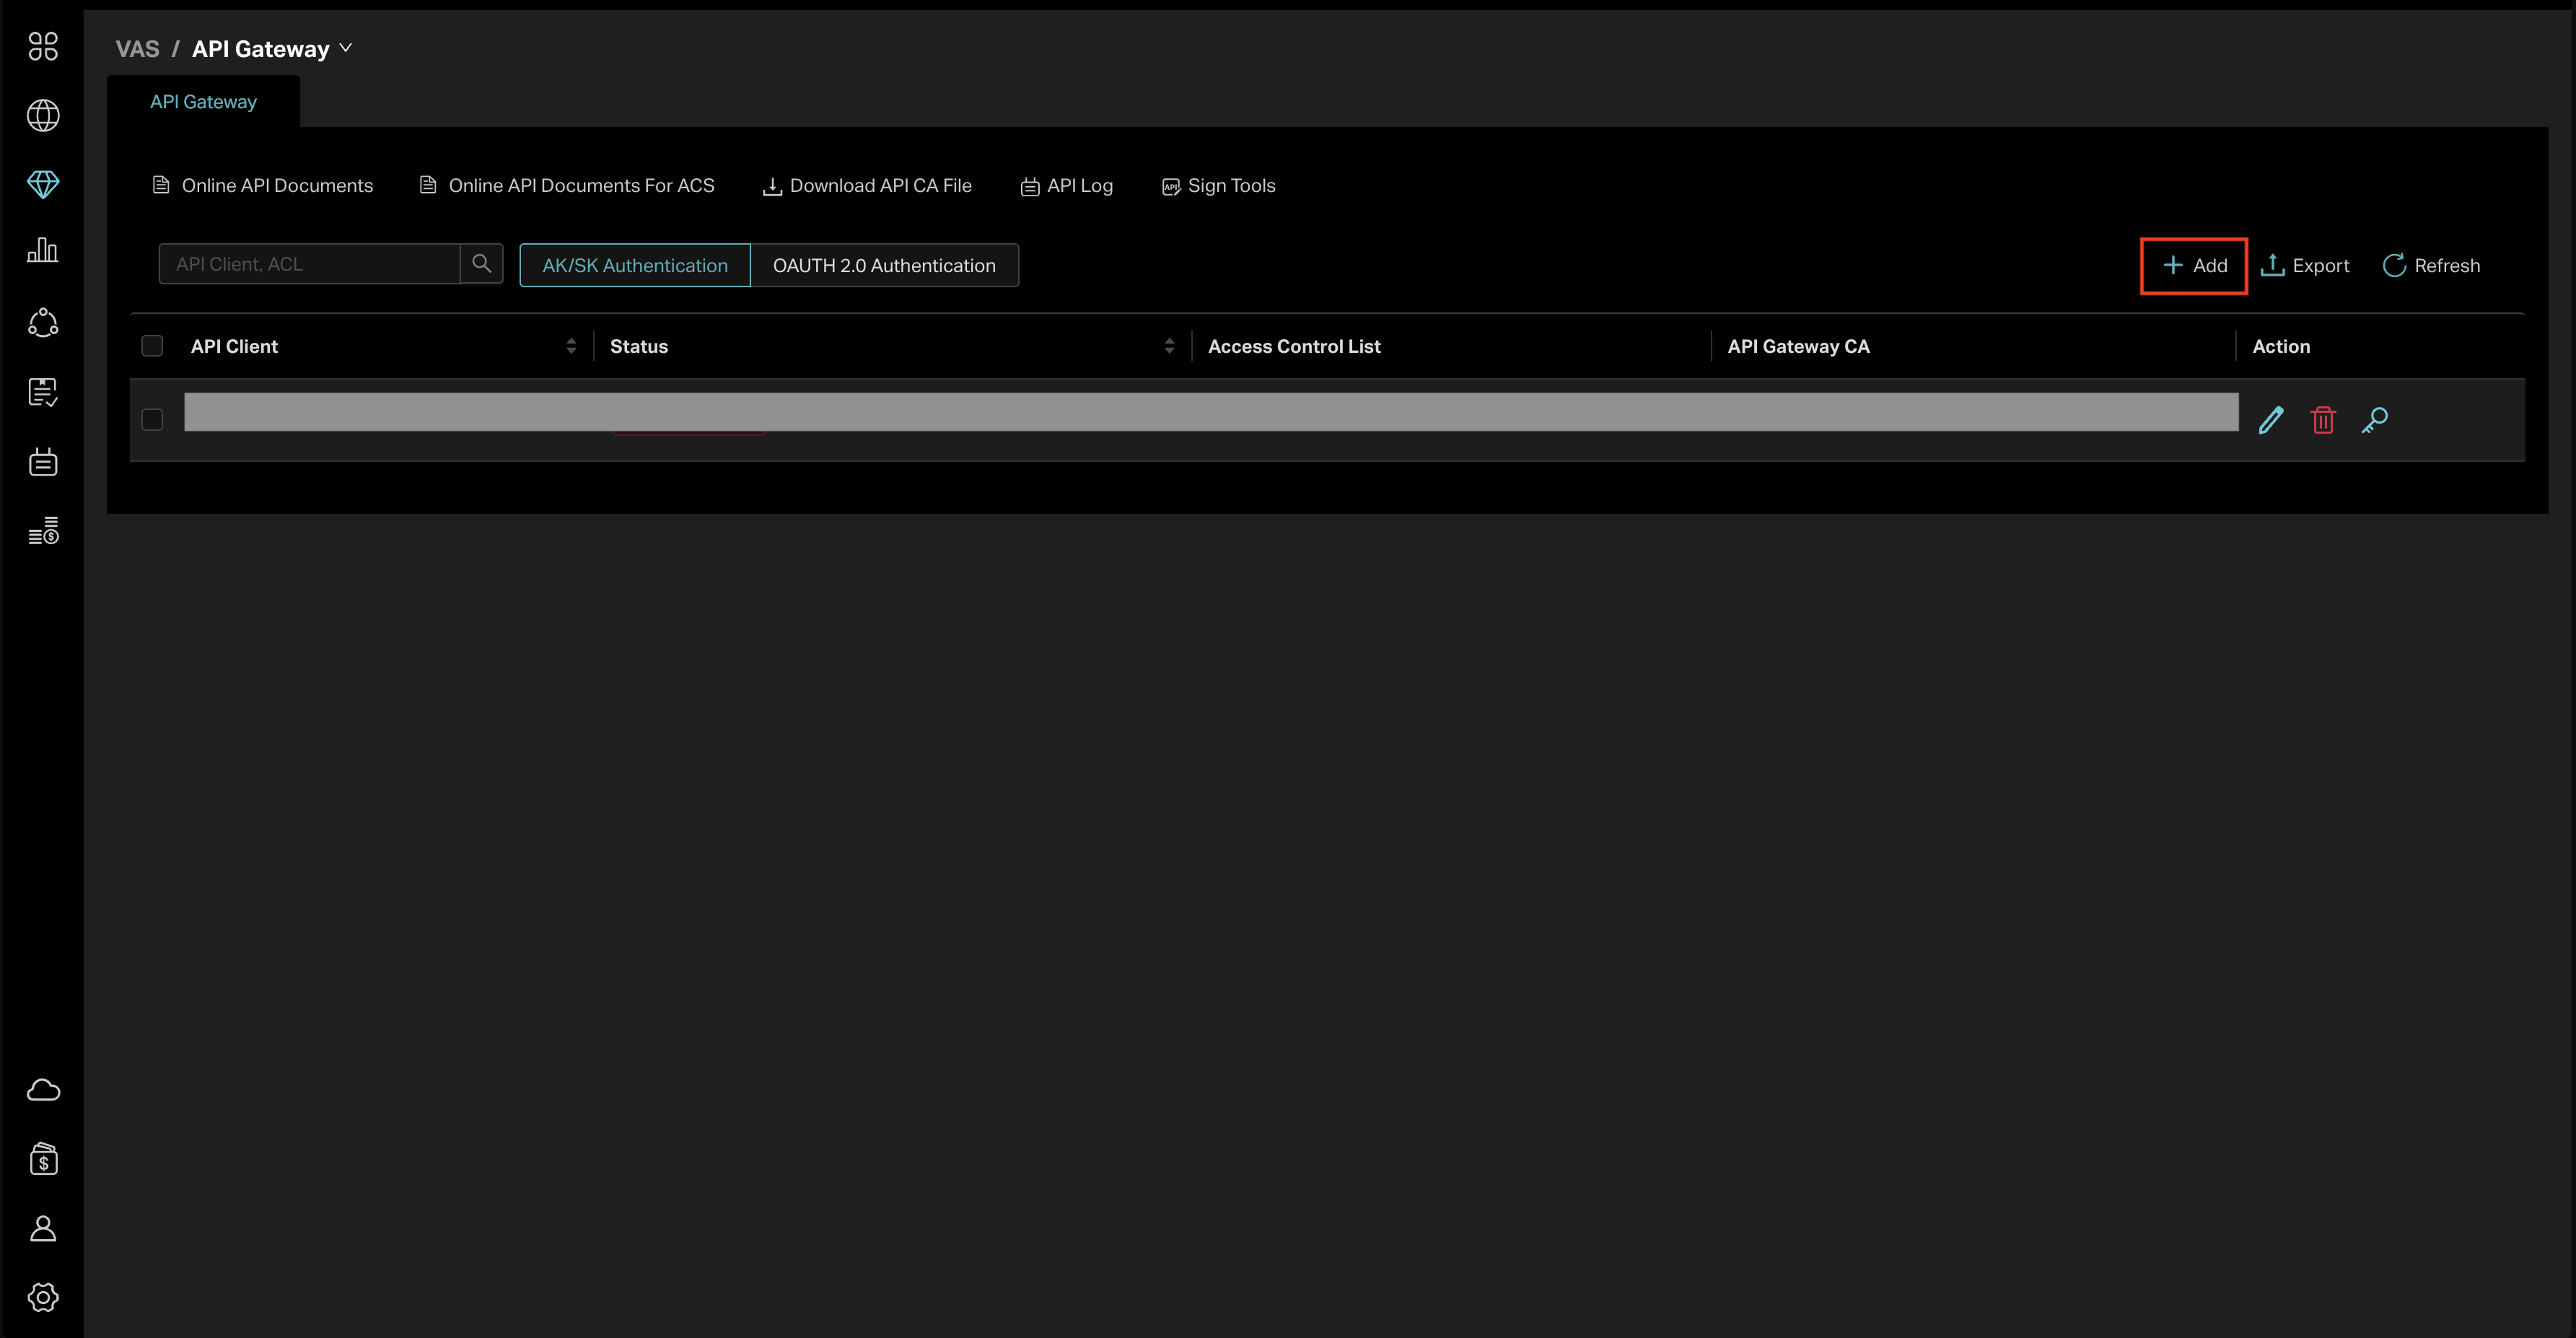
Section titled “Step 2: Create New API Key”Click the + Add button to create a new API key.
Step 3: Configure API Key
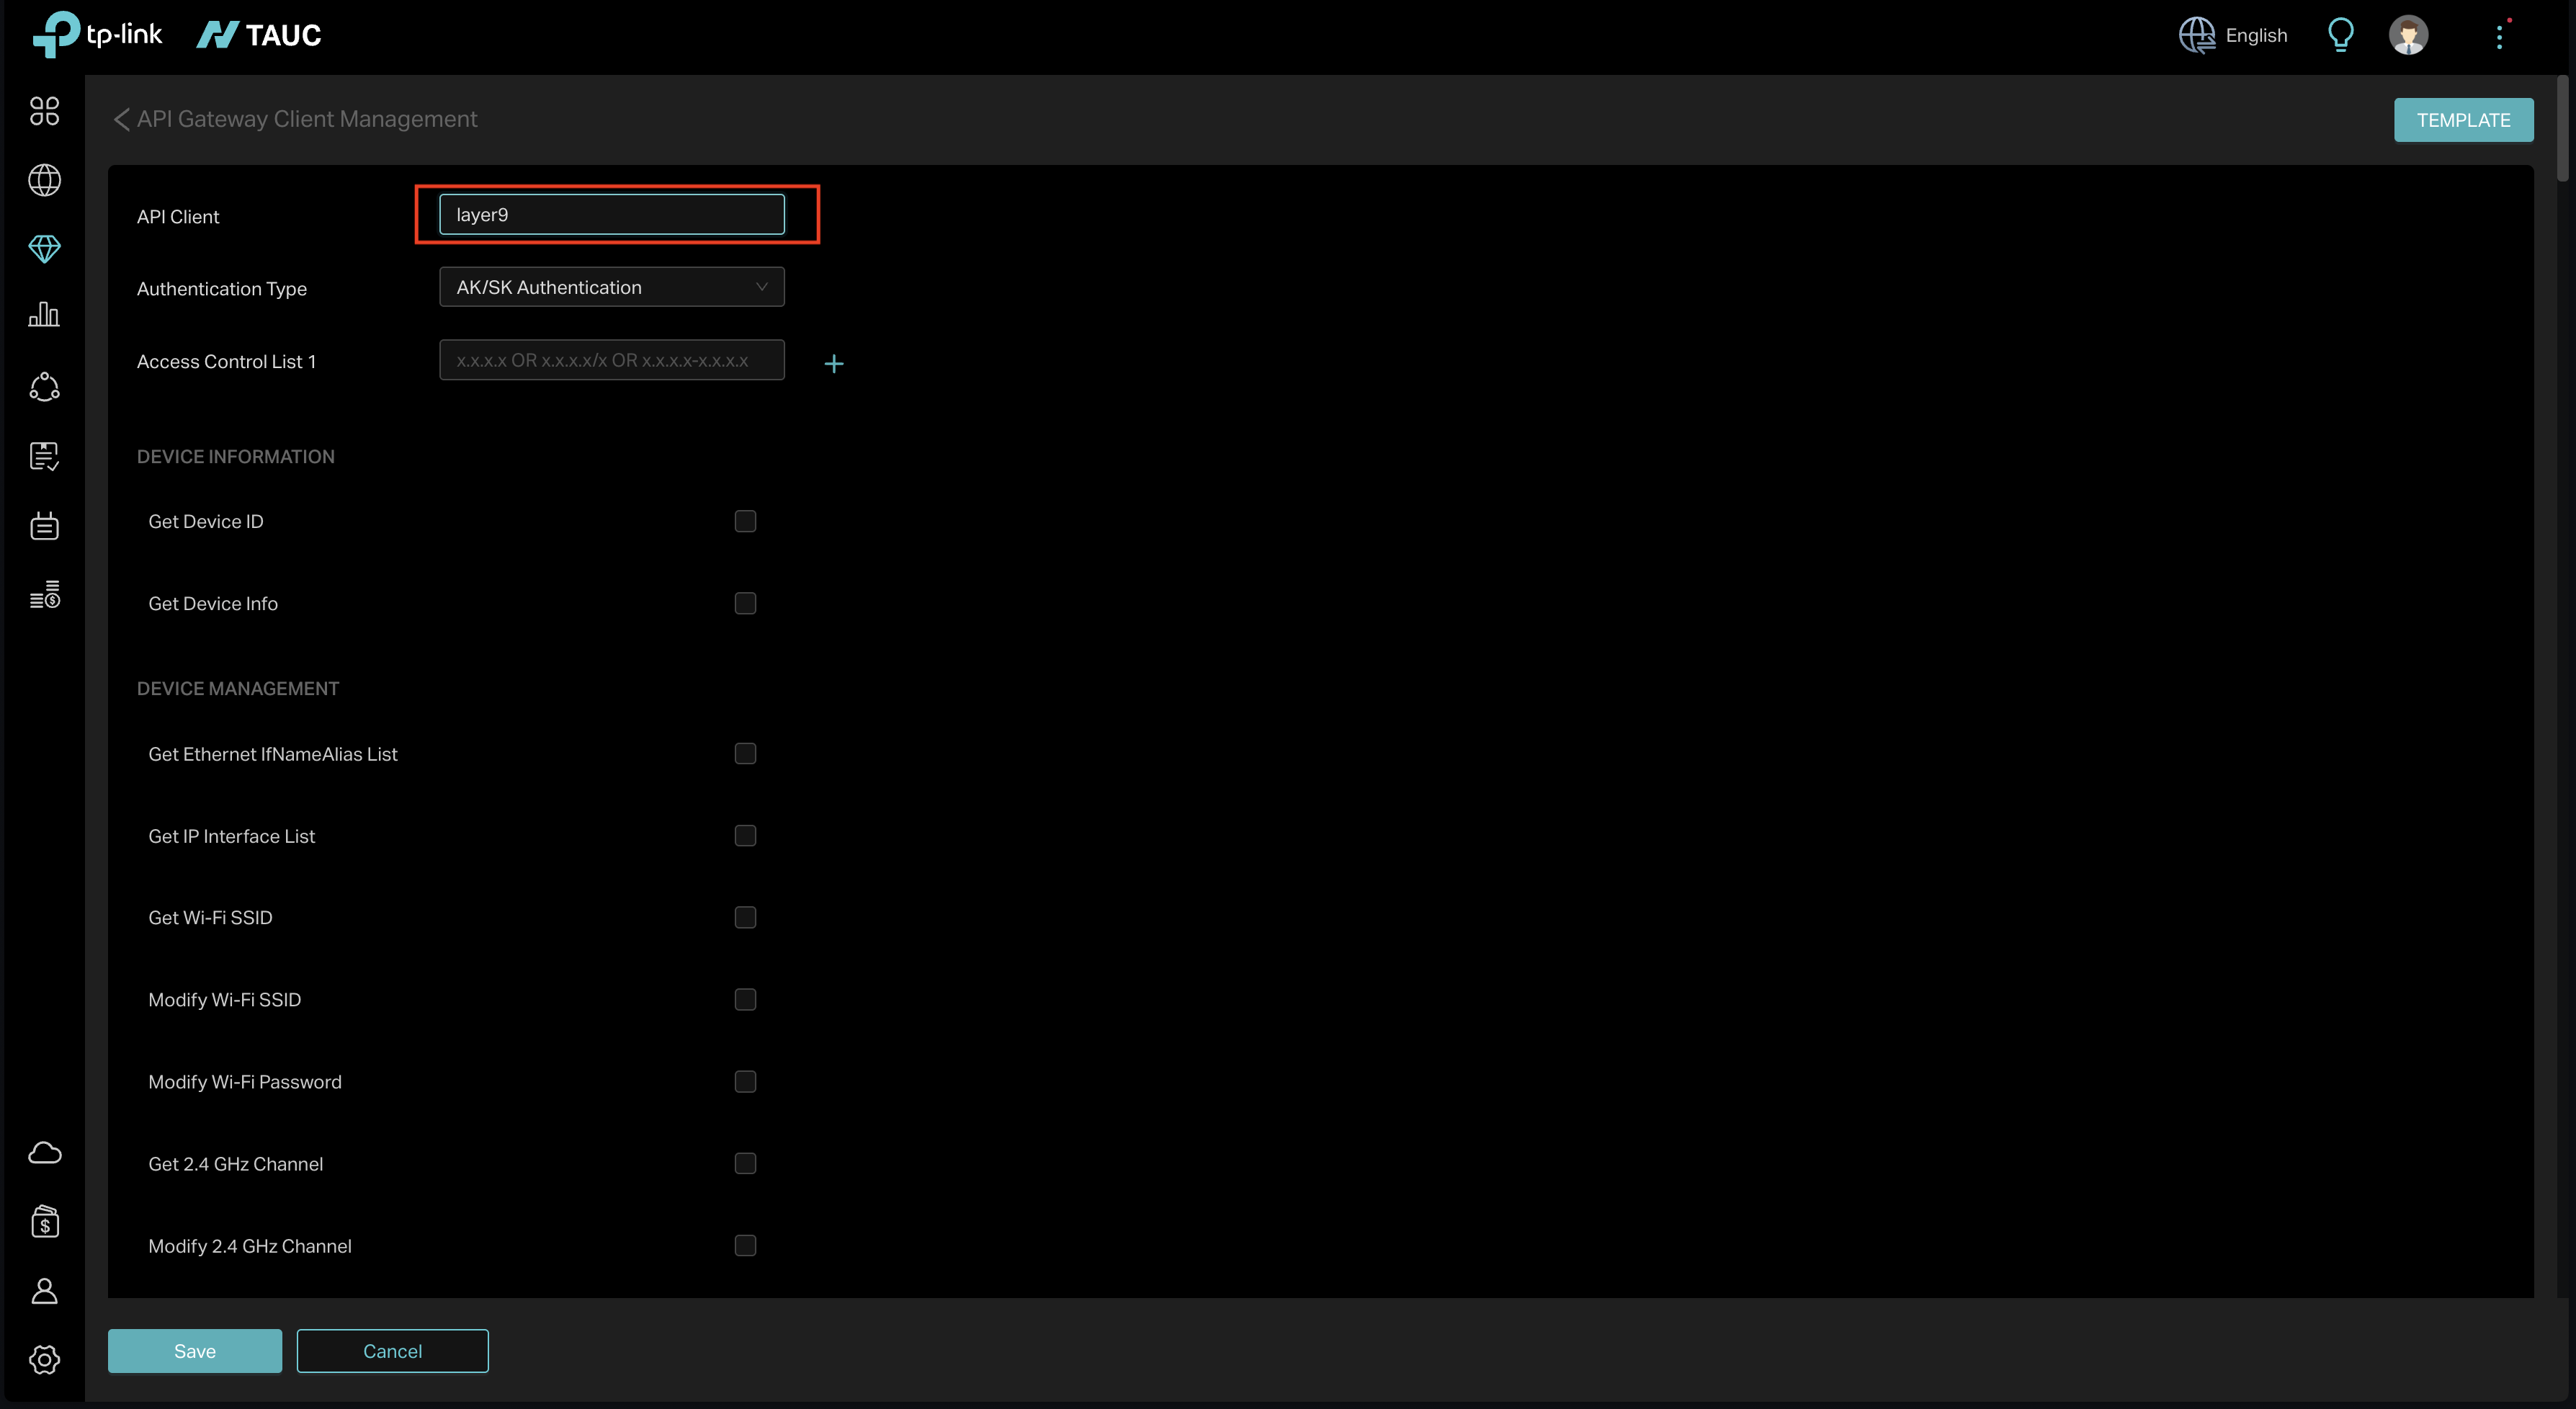
Section titled “Step 3: Configure API Key”Enter a recognizable name in the API Client input field and select AK/SK as the Authentication Type.
Step 4: Configure API Permissions
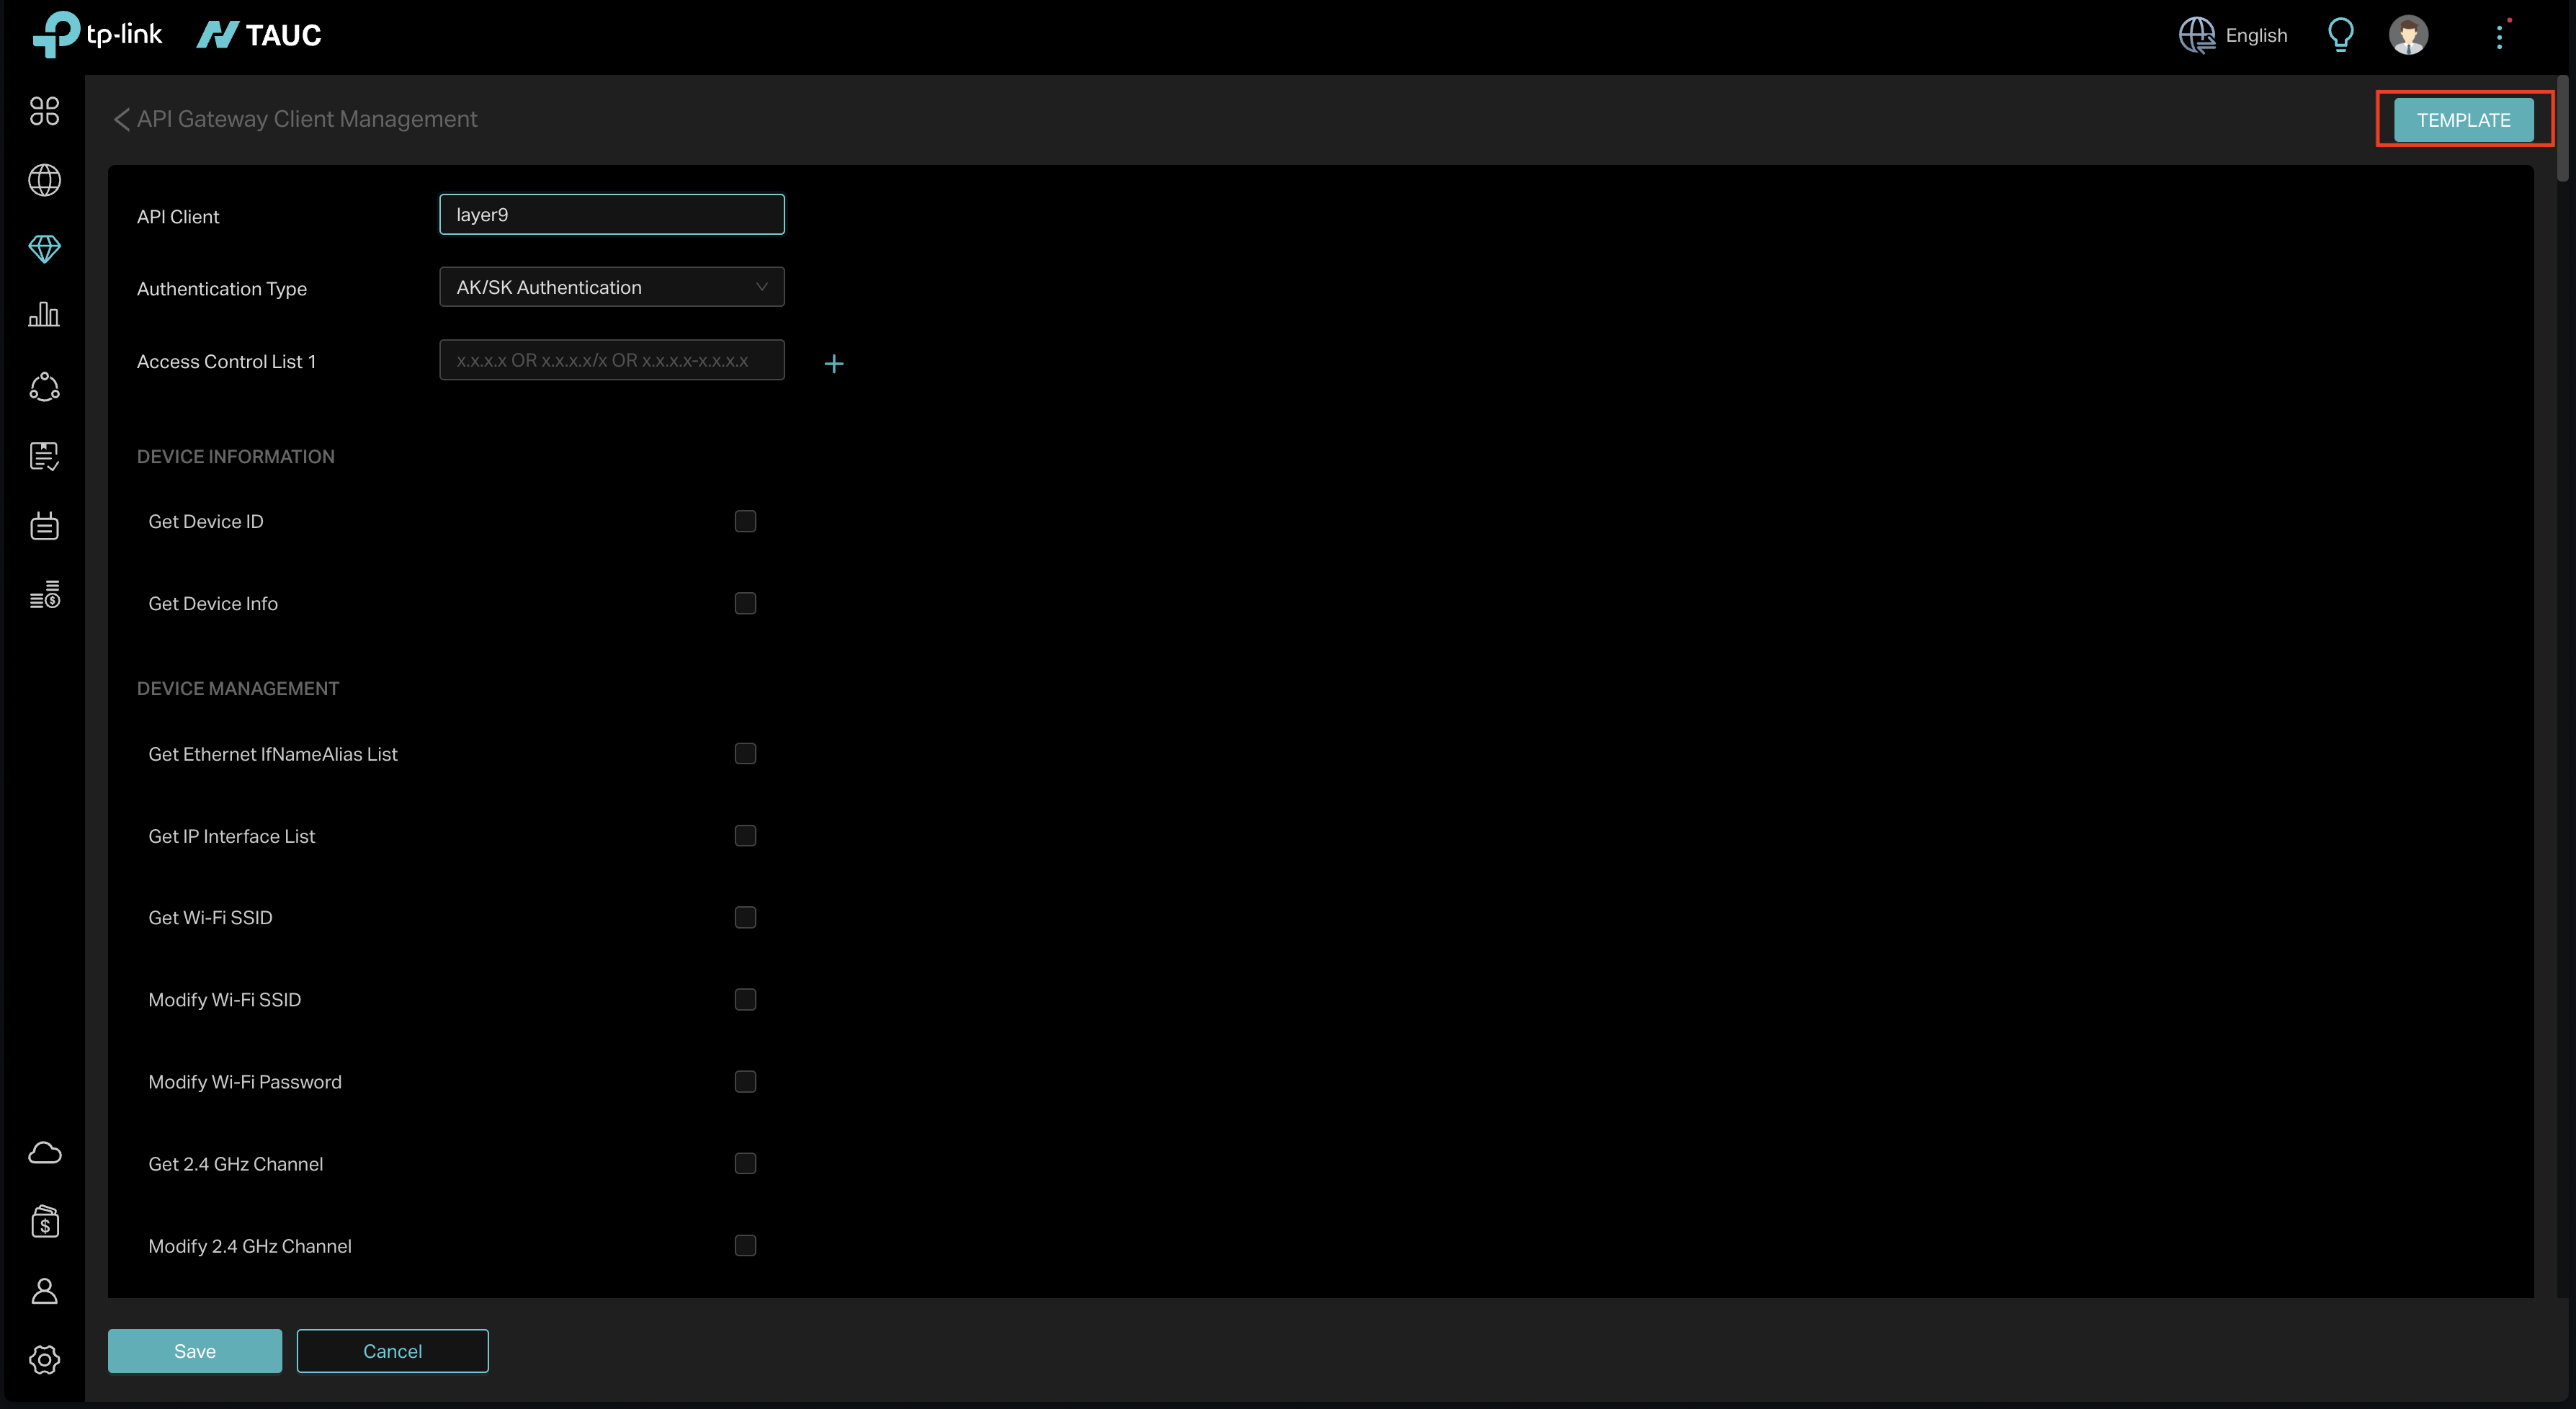
Section titled “Step 4: Configure API Permissions”Click the Template button in the top right corner.
Select the Self-Care Web Portal preset and click Apply.
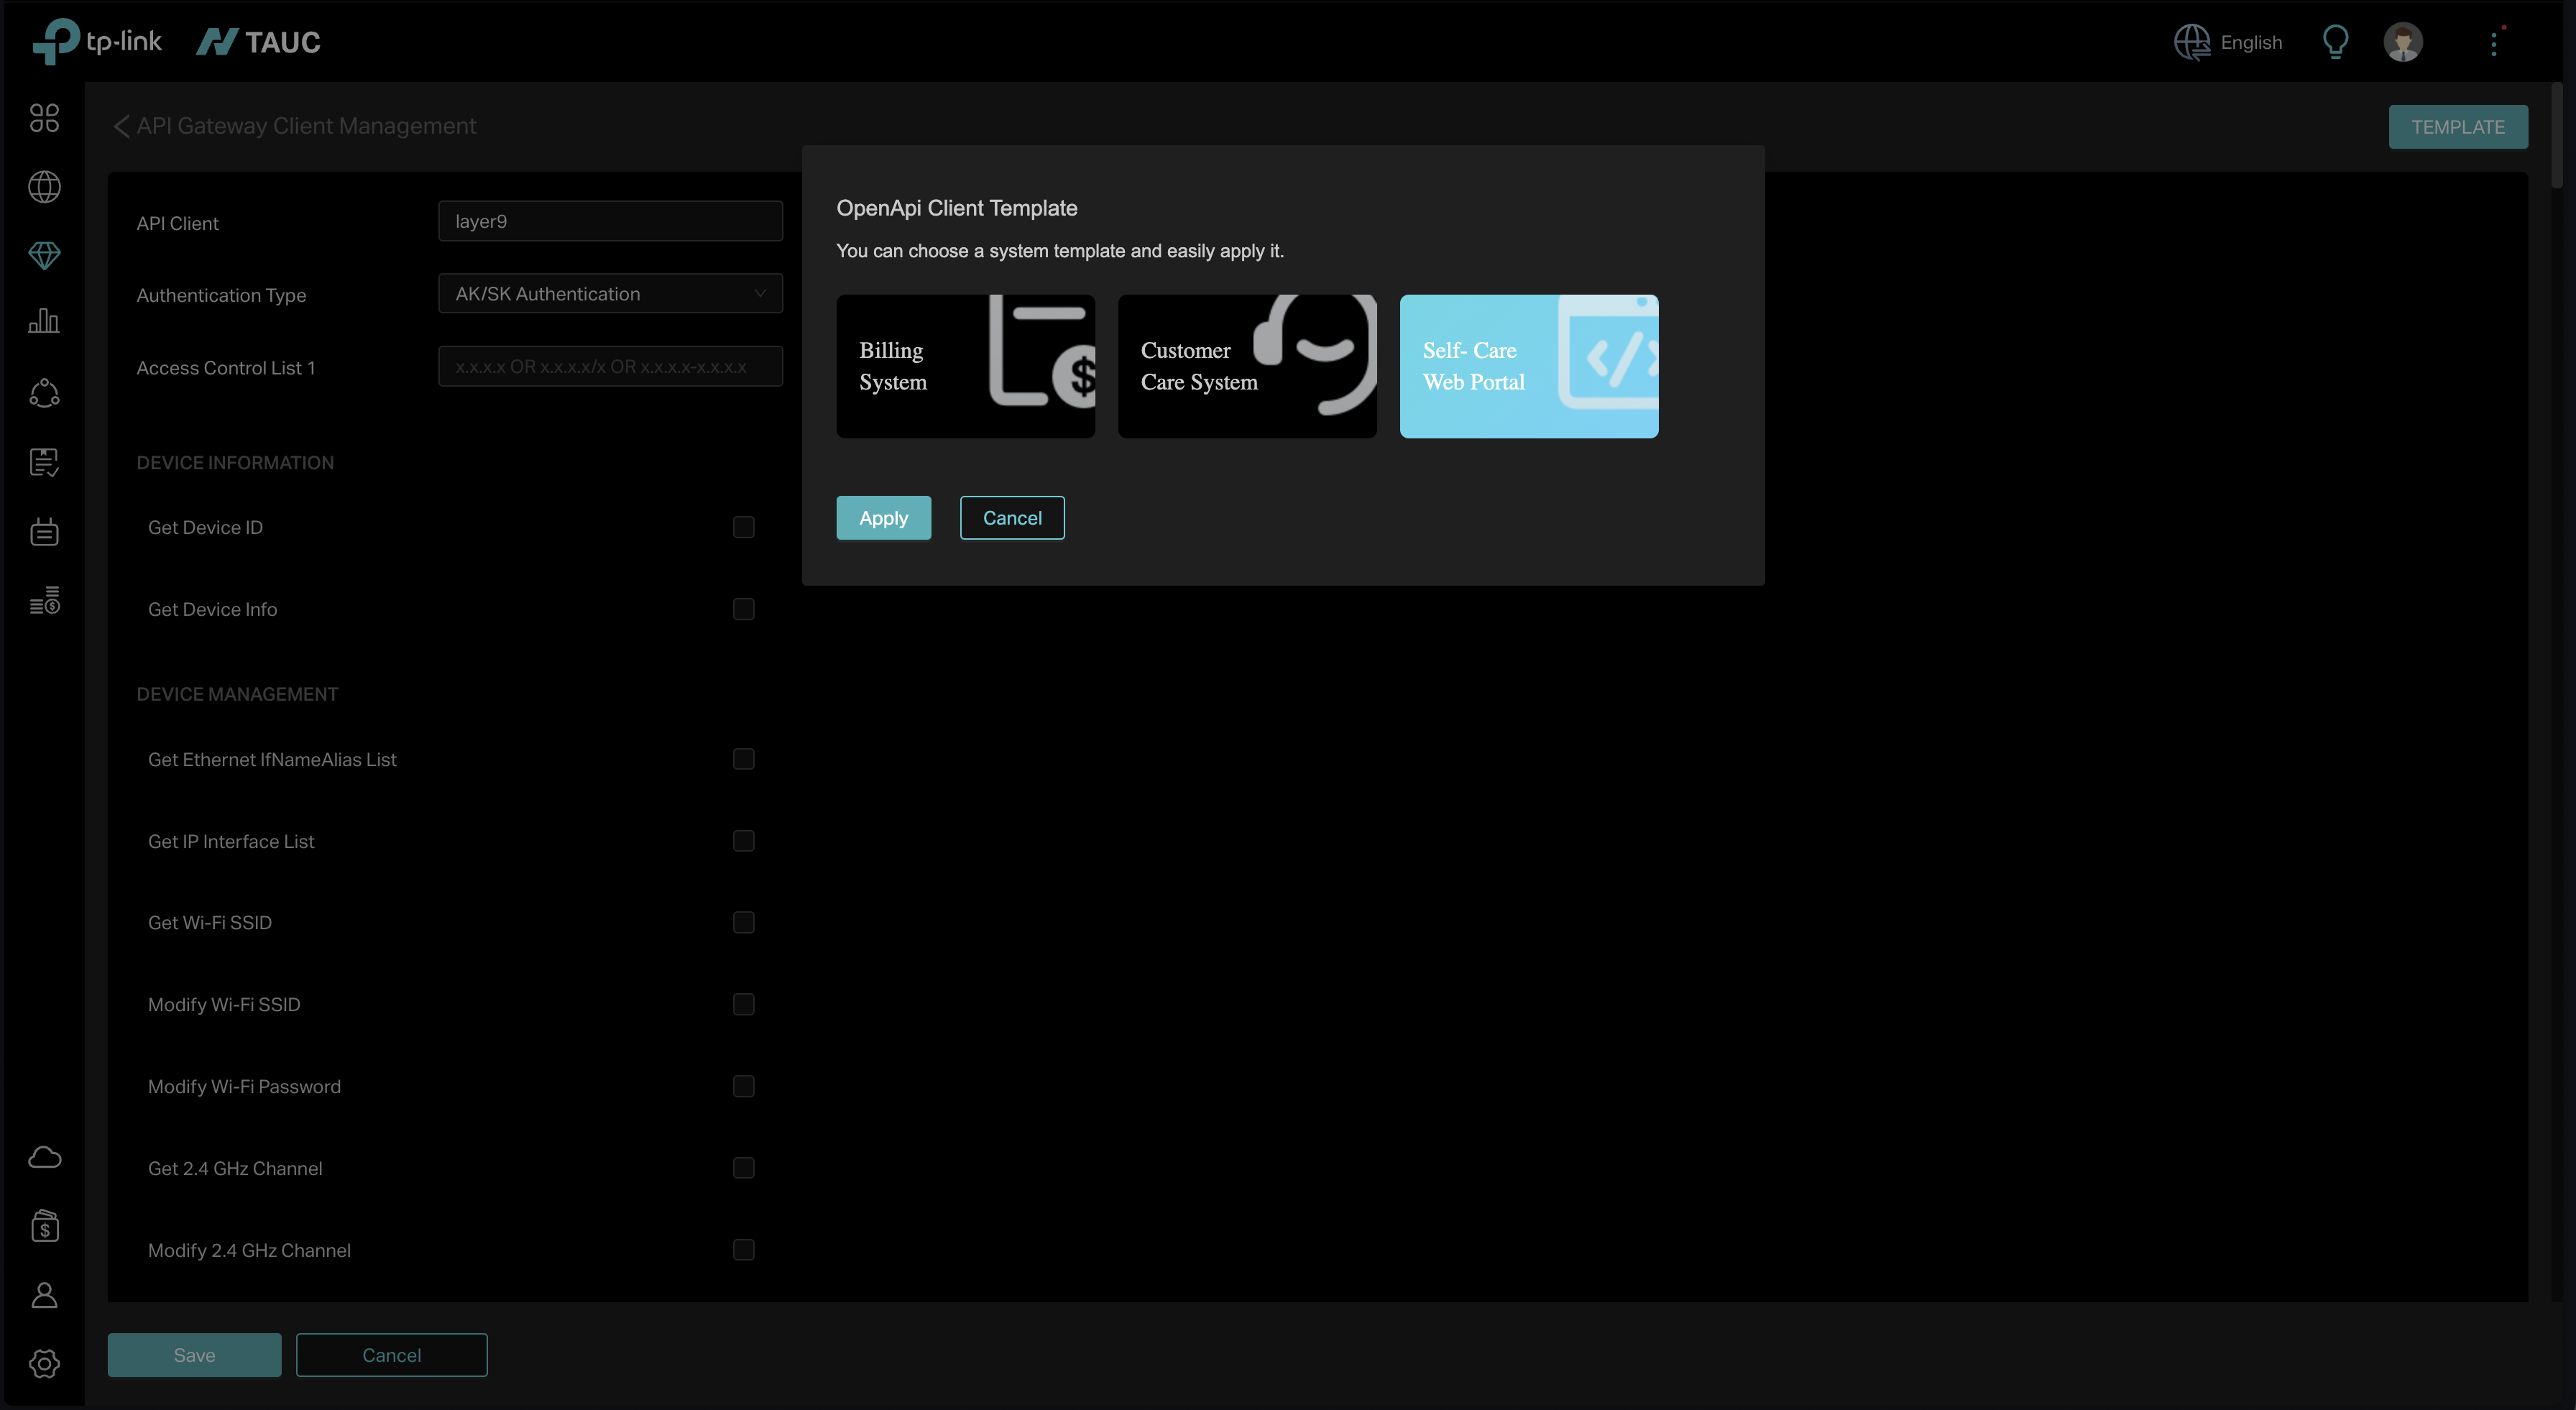
Click Save to create the API key.
Step 5: Download Client Credentials
Section titled “Step 5: Download Client Credentials”Click the key icon for the newly created key to download a zipped archive containing your credentials.
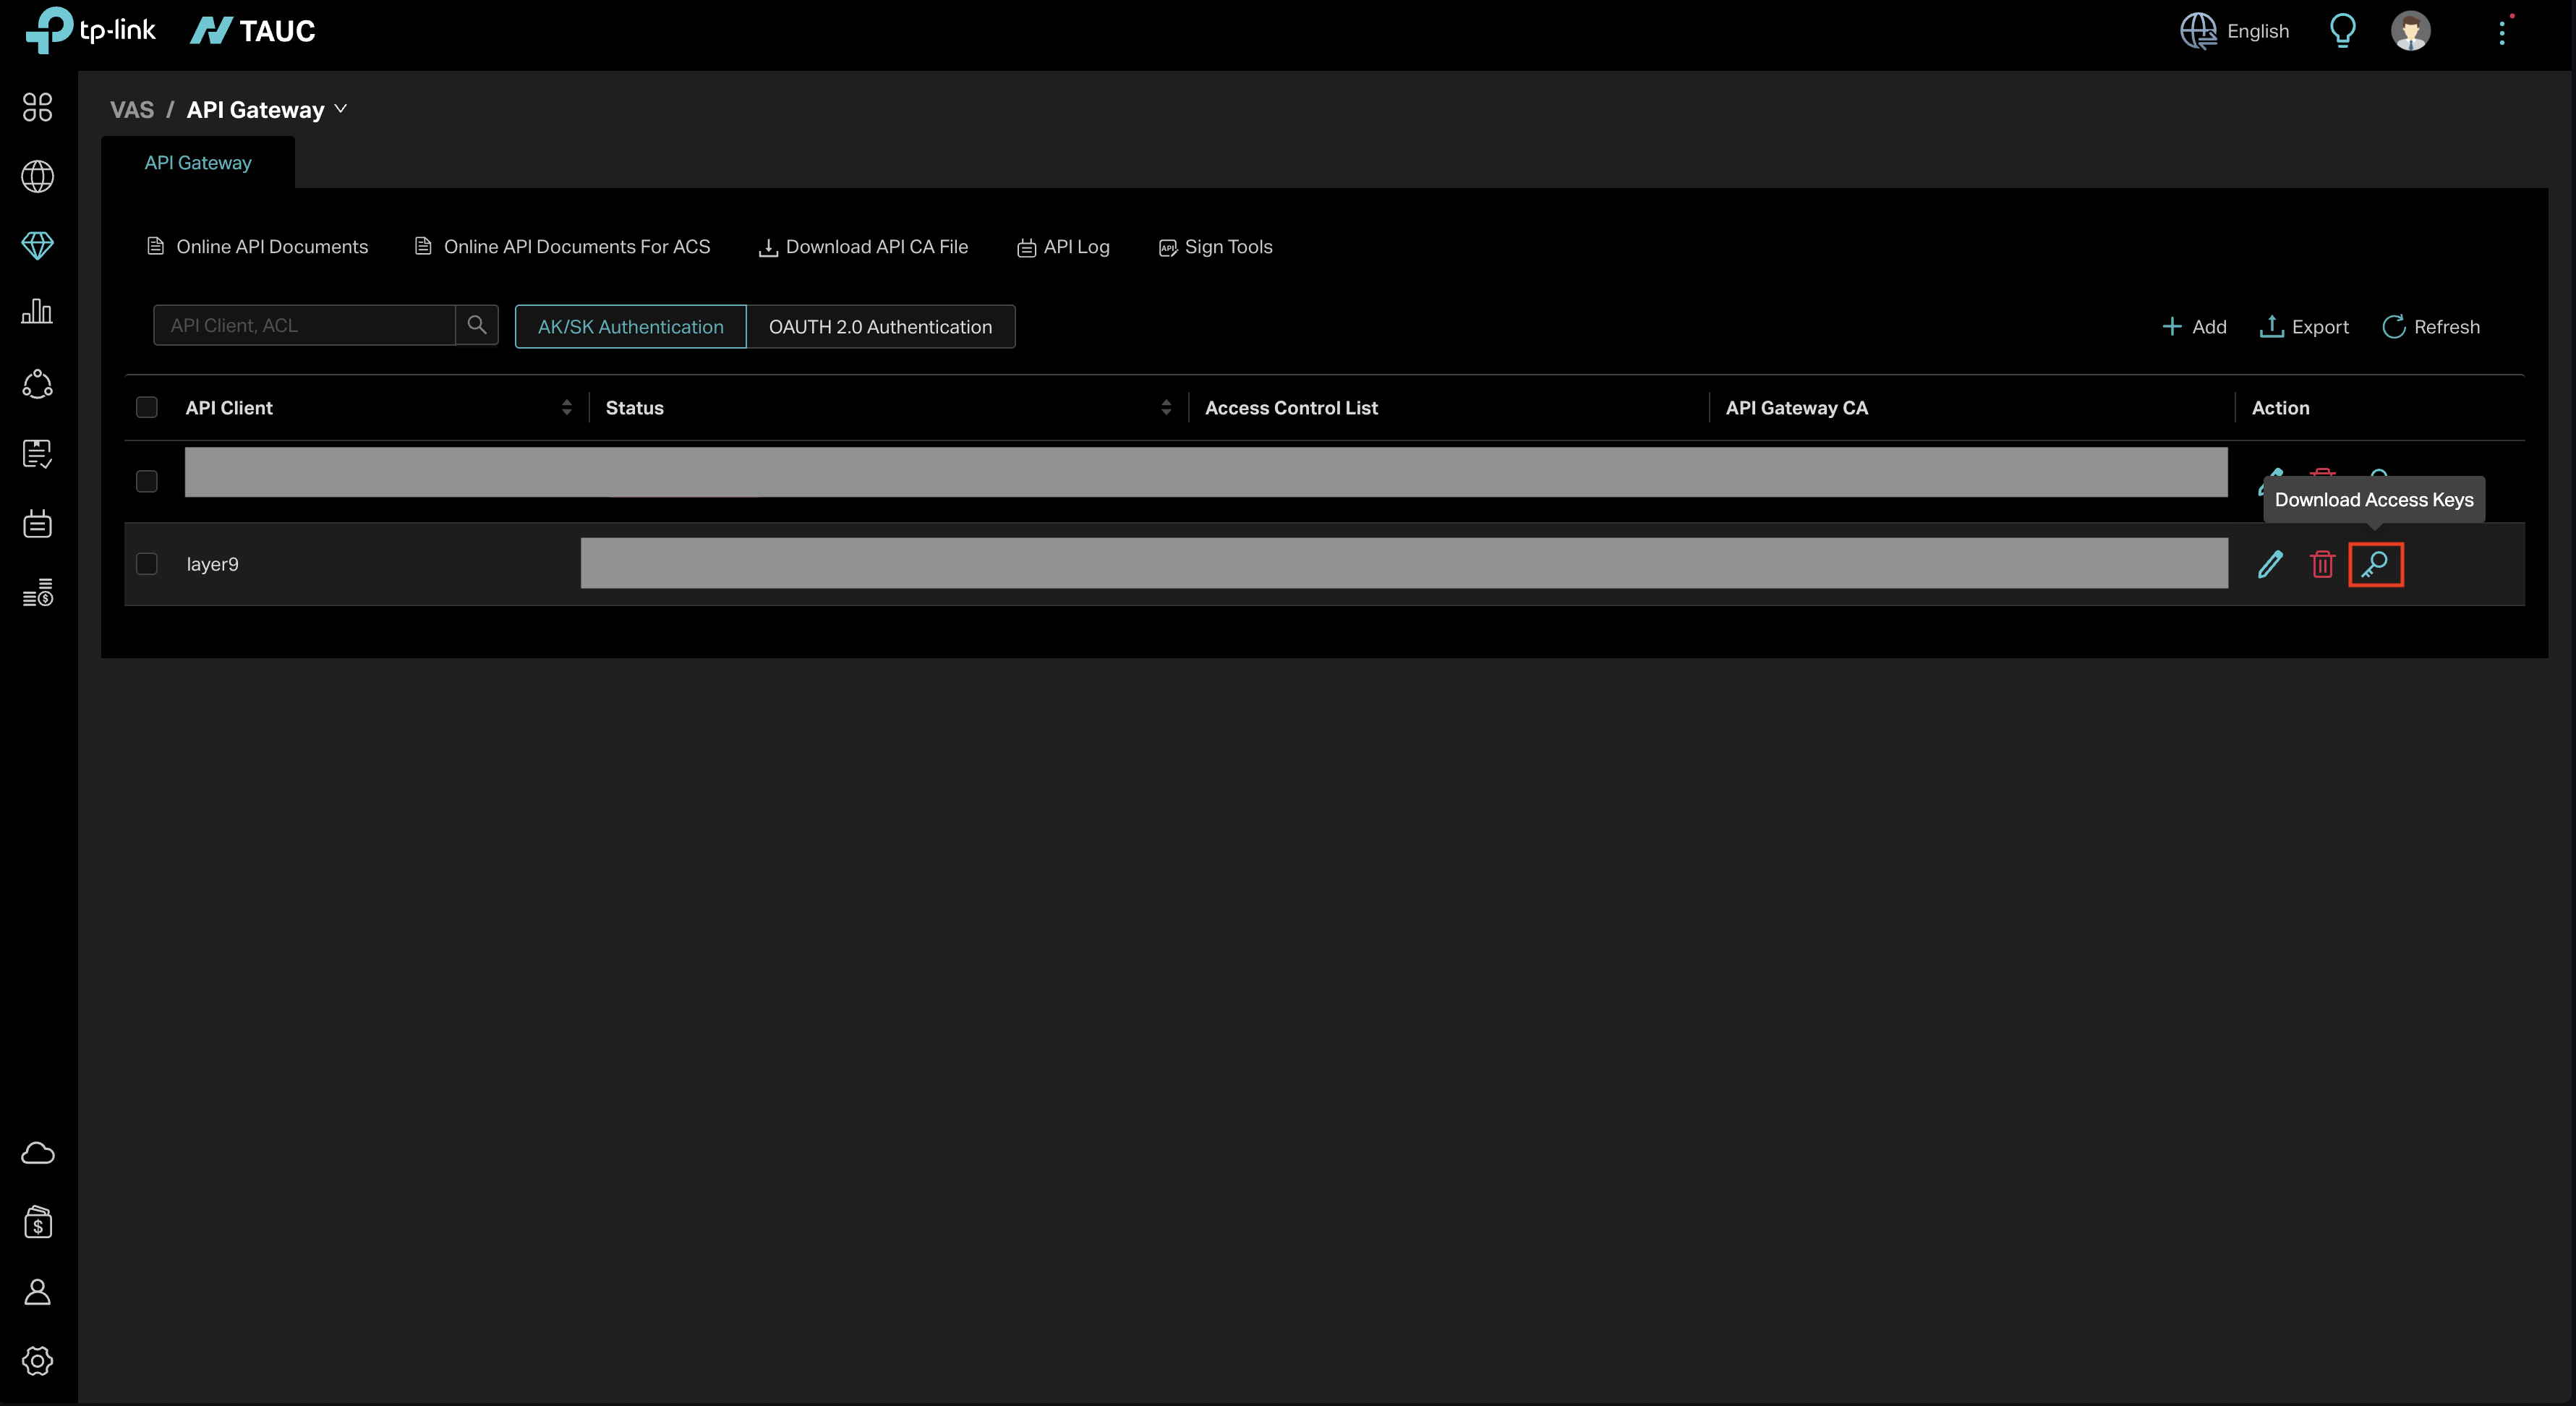
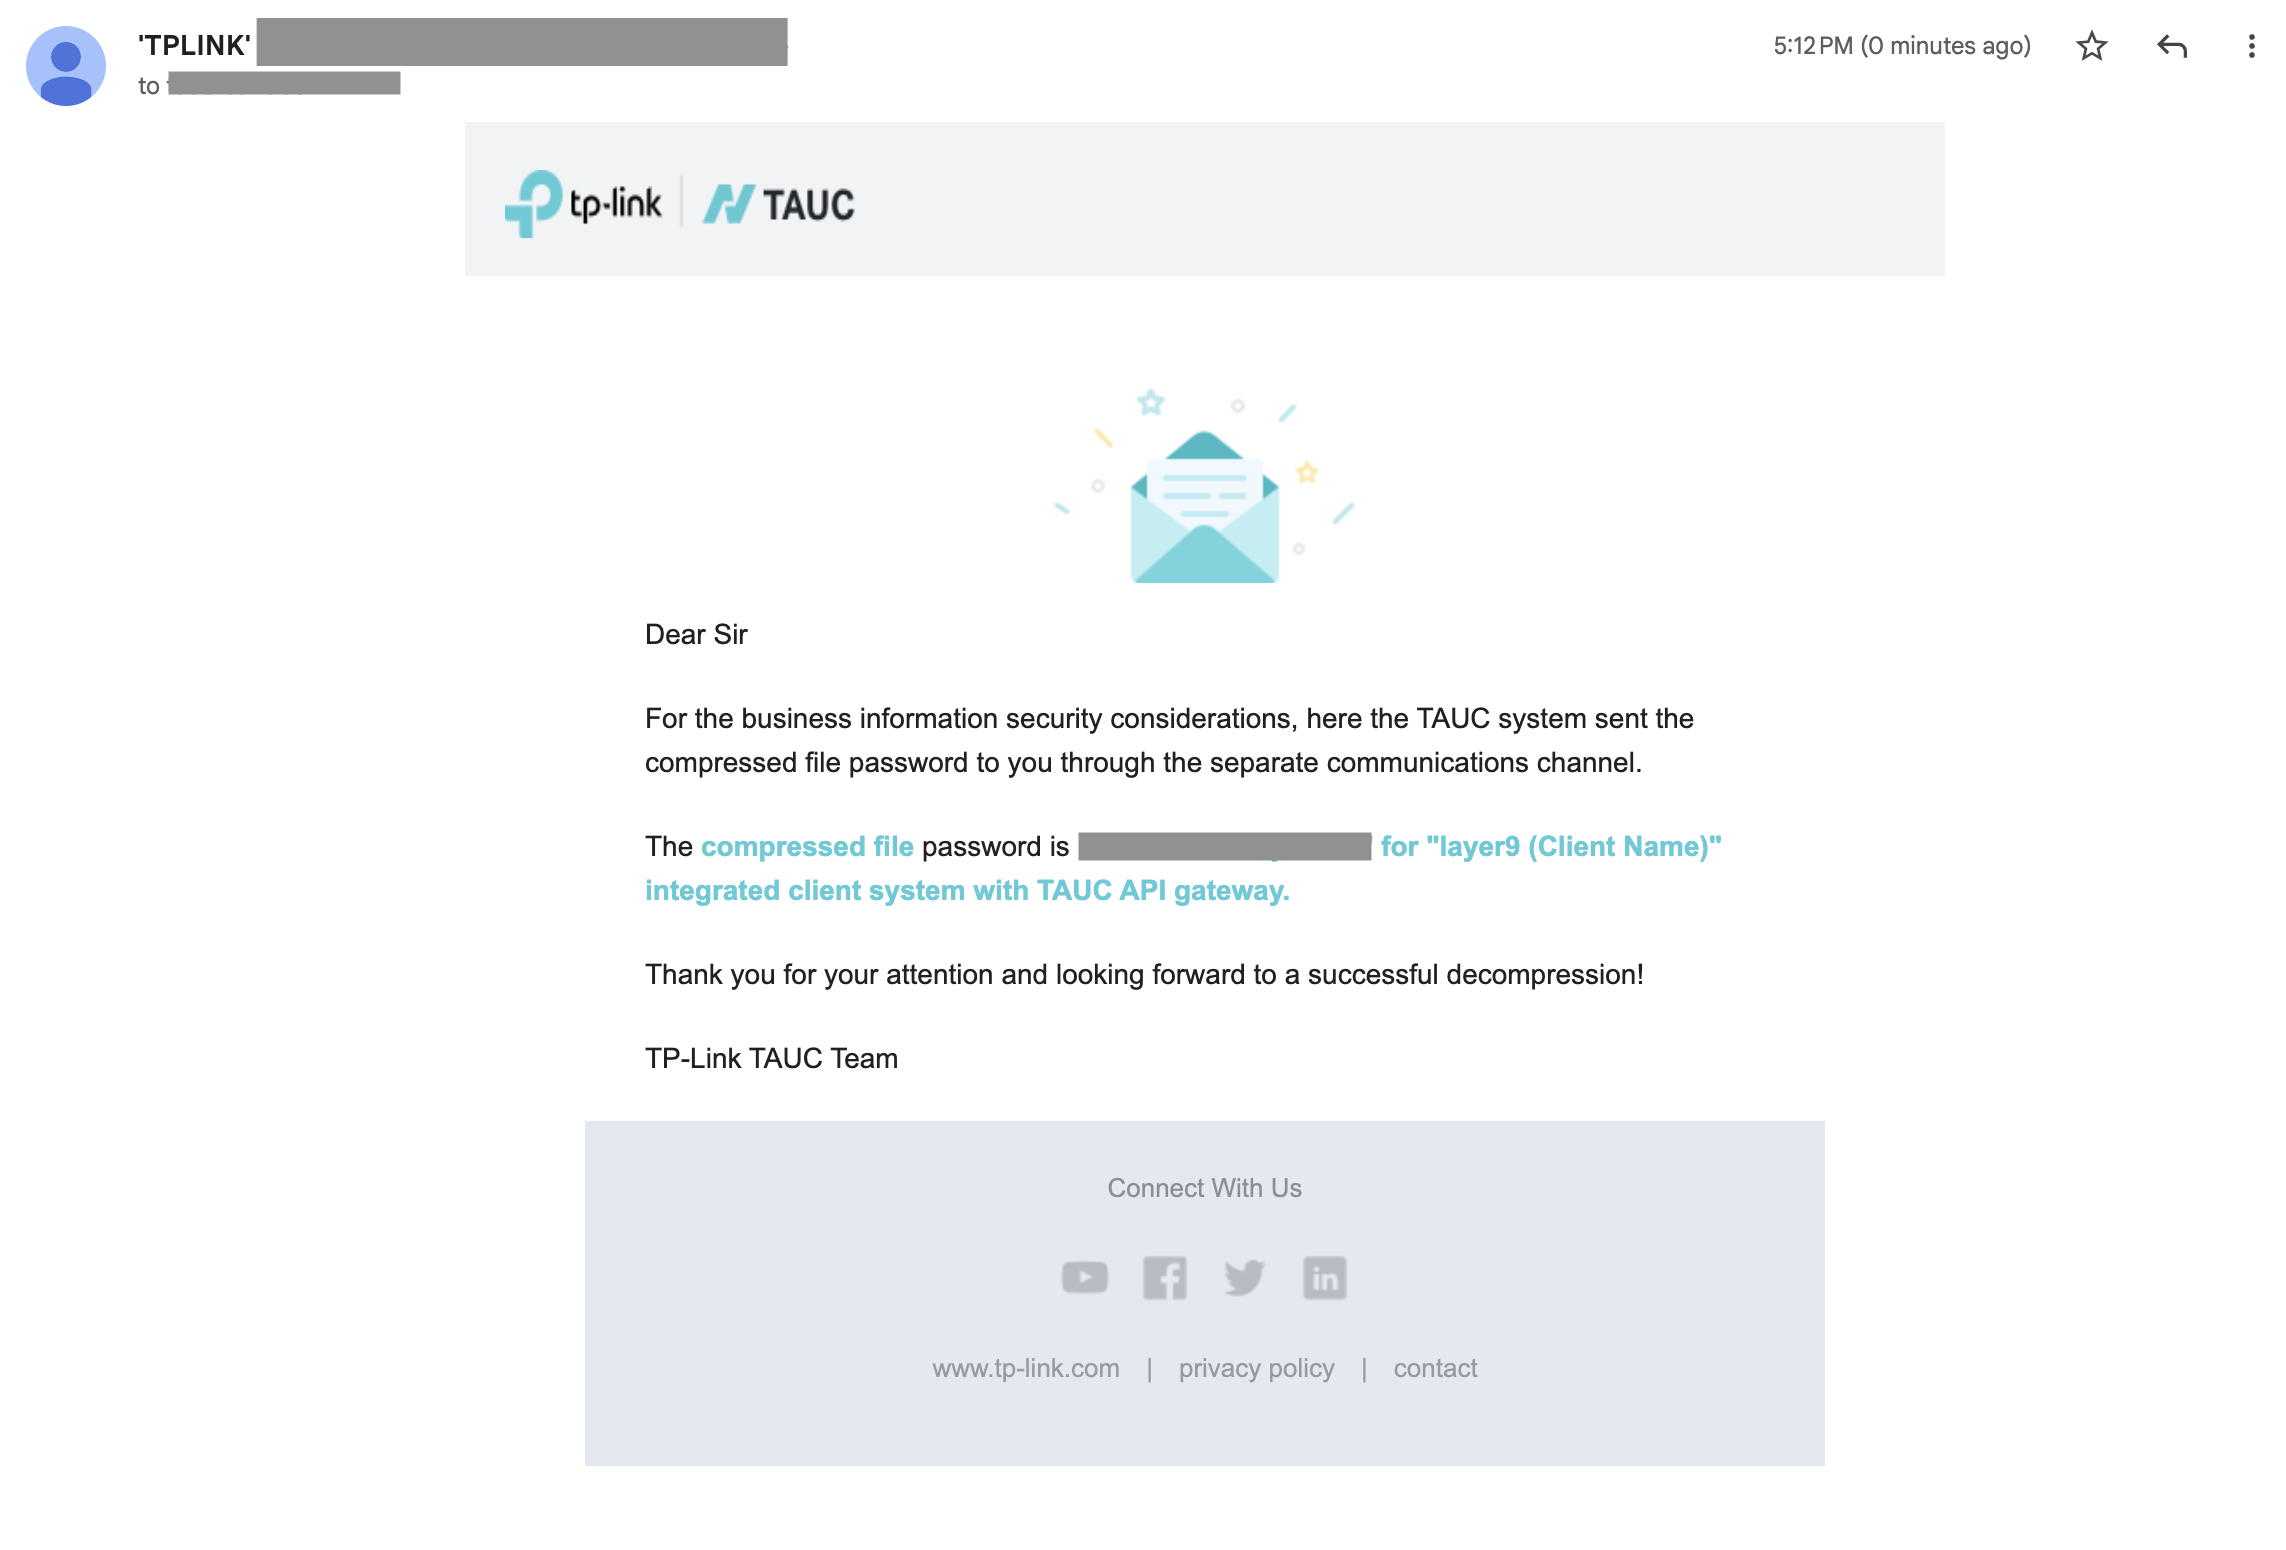
TAUC will separately send a password for the zipped archive to your email address.
Step 6: Share Credentials with Layer 9
Section titled “Step 6: Share Credentials with Layer 9”Share the following with the Layer 9 team:
- The downloaded zip archive
- The password received via email
TR Parameter Profile Configuration
Section titled “TR Parameter Profile Configuration”Enabling a TR profile is required for each device to be polled by TR-069. This requires configuring a TR Parameter profile in TAUC that Layer 9 can programmatically apply to the devices TAUC manages. Create one profile per device model.
Step 1: Open Profile Management
Section titled “Step 1: Open Profile Management”Navigate to Profile Management and select the TR Parameter tab.
Step 2: Add a Profile
Section titled “Step 2: Add a Profile”Click + Add.
Step 3: Name the Profile
Section titled “Step 3: Name the Profile”Give the profile a memorable name that identifies both Layer 9 and the device
model — for example, Layer 9 - <model name>.
Step 4: Select the Device Model
Section titled “Step 4: Select the Device Model”Choose the model name this profile will apply to.
Step 5: Configure TR Tree Parameters
Section titled “Step 5: Configure TR Tree Parameters”Set the following TR Tree parameters:
| Parameter | Value |
|---|---|
Device.ManagementServer.URL |
The ACS URL configured by Layer 9 for you |
Device.ManagementServer.PeriodicInformEnable |
true |
Device.ManagementServer.PeriodicInformInterval |
300 |
Device.ManagementServer.EnableCWMP |
true |
Step 6: Save
Section titled “Step 6: Save”Click Save.
Step 7: Repeat for Each Model
Section titled “Step 7: Repeat for Each Model”Repeat steps 2–6 for each device model you want Layer 9 to poll.
Step 8: Confirm with Layer 9
Section titled “Step 8: Confirm with Layer 9”Let the Layer 9 team know once the profiles are configured.